
TIP-3000
Introduction
Right! It’s time for me to get down to posting some of my work. I’m sure forum regulars have noticed me hovering around, offering advice, giving my opinion, but never actually seeming to do any real work.
Well, here we go. Because of uni and my job I rarely have time to get down to doing anything creative, and spend a lot of my time on trains and so-forth talking about doing it more than actually making something. When I joined these forums, I didn’t really know much about the world of modding, or about the world of electronics. Since then I’ve been inspired by a million amazing mods, and now it’s my turn, hopefully, to inspire someone else.
My mod project is no small undertaking. It involves modding 2 cases and then a lot of hardware hacking and so forth in order to make a gaming computer and a mini-server, both of which can control a variety of different things around my home. They’ll be attached to a wireless network running 3 other computers, and the theory is that at the end of the day I’ll have power over pretty much everything from a single chair.
Sounds ambitious for a first time mod? Well, it is bit, but i have a plan. First, I’ve set up a dingy workbench in my cellar. I’ve borrowed and bought a cheap set of tools, and I’ve studied electronics. Having not done anything practical, this is my first ‘real’ foray into the world of computer modding, and I plan to document it well for all to see.


So how do I plan to do this? I’ll keep it simple:
- Stage 1 : Gaming Box
- A Modded box for my hardware.
- Stage 2: Fallout Mini-server
- A miniserver with a Fallout themed mod.
- Stage 3: Integration
- The final goal. Wiring, signal amplifiers, constructing KMV switches-the nasty shizeny.
You’re looking at Stage 1, the gaming box. As it’s my spring break I want to get as much done as I possibly can, because the next big chance I get is going to be 2 months away after my exams.1

010101 rated stuff here!My aims here are hopefully to make a decent mod with the basic tools available to me, and to learn techniques with an easy mod that I can carry on to stage 2. I’m also making a website based on this mod, which is part of my assessed coursework. It’s due in 3 weeks time, so I’ll be making the website along with the case (I doubt I’ll get the whole case finished in 3 weeks, but if you don’t aim high, you’ll never hit it!) for which I’ll need 3 suckers… erm I mean helpful forum peeps… to look at and help fill in a questionnaire (bleh).
I’ve started off stage 1 with a PSU mod, the PSU being the only piece that I’m certain about at the moment. I’m still drawing up the plans for the rest but I’m not sure how much each part will cost and therefore how much I can get done.
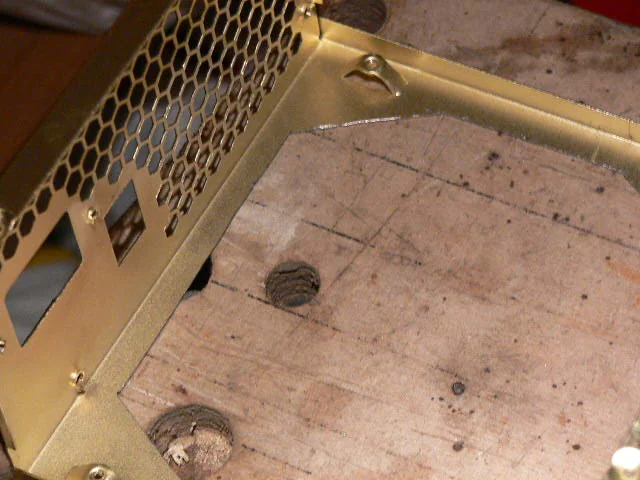
The PSU mod consists of putting some orange LEDs inside, feeding off the 5 volt always-on wire. First I took apart the PSU and removed the chipboard and the switch. Then I de-soldered the switches and removed them. Using a permanent marker, I drew up my plans for the box, and with my cheap knock-off Dremel I set to work hacking it to pieces. Remember kids, old man says always wear eye protection! I’m a sucker for safety, they say. But they’re blind now, so haha.2


Back on track! (Gee, I can really talk!) I was well into the first part, and hacking away through my second part, when my cheap Dremel knock-off decided it didn’t like me enough to keep working. This is probably the first time ever a cutting disk has lasted longer than the drill. Grr!!! So I tried fixing it with some foil but the foil got destroyed by either temperature or vibration and came out as powder. So don’t try and use foil to make a Dremel bit fit into a Dremel knock off. Does anyone have any ideas about how to get those stickers off the damn metal? It leaves behind a mess that not even sanding can help with. Anyway, I filed down the edges of what I had done and those came out alright.
Now that I have this part sorted out I want to get into my plans for the rest of the case. The innards of my case are getting painted orange with gloss, and all outer bodywork with matt black. There’s a theme of orange LEDs throughout, with orange perspex and black mesh helping to add tone. At the front, I’m trying to veer away from the standard lights and dials type of feedback, and instead go for something less practical and more… organic you could say? I’ll post my plans later, as I’m still in the cellar. It’s cold down here, but we Scots are hardy folk.2
I need to contact someone who gave a quote for the panels for both of the cases, the Fallout and the Gaming case. I’m trying to work out if I can save money and work by using what I’ve got here. I’ve acquired some flat side panels, and if I can get my hands on some Bondo, I reckon I could simply use that and then not have to worry too much about anything else. I’ll have to go to B&Q and have a look.
Right, that’s enough for now. I’ve not said everything that I wanted to say but it looks like I’ll be here all night as it is. So I’m posting this and then getting to work on my website, and I’ll next get some modding done on Monday. By that point I’m hoping to have my drawn plans finished and I’ll be posting them. I also hope to have removed any remaining stickery stuff.